Monday, 26 August 2019

Capture the moment


Hello everyone, this is a project that is so close to my heart. On that pic are my elder daughter and my son-in-law. After their first romantic shopping, all that left was an empty shopping bag which I wanted to fill with "fond memories" about them. I tried to capture all their colourful moments.. unfortunately the bag was too small to capture all. Hope you too have lot of empty bags, now you can fill those with all your moments... colourful moments.


Here is a STEP BY STEP Video Tutorial:


Product used in this project:

Liquitex:
White Gesso

Lindys Magical Shaker:
Time Travel Test, Autumn Maple Crimson, Grab a Guy Gold, Bavarian Blue, Afternoon Delight Denim

Lindys Embossing powder :
Cosmic Pink Blue

Métallique Acrylic Paints:
Deep water, Pink Blush, Fairy Wings, Coral Reef

Glimmer Mist:
Its Black

Ranger Color Wash:
Denim

Stencil:
TCW Moving Vines, Stencil Ledger
Little Birdie Stencil Flora Enchante

Chipboards:
Scrapiniec

Used some goodies from my stash...

Thanks for visiting my Blog...

Tuesday, 28 May 2019

Beautiful jewel box


When my mom was here, she wanted to try something in craft... So we both decided to do a memory box for each other.. She used White Gesso to have colourful one and I used Black Gesso to give a  vintage look.. I helped to finish it for her according to her taste. My mom was soo happy to see the outcome and now she can be a part of this crafting...


 Here is a step by step Video tutorial..


 List of product I used in this project:


Lindys spray:
Sweet Violet Purple Teal, Tainted Love Teal, Tibetan Poppy Teal.

Art Alchemy Acrylic Paint:
Metallique Emerald Green, Metallique Plum Preserves, Sparks Dragon Eye.

Art Alchemy Métallique Wax :
White Gold

Here is the video tutorial


Pls do watch Like, Comment and Subscribe to my Youtube channel Kreativity77

Thankyou for visiting my Blog..


Sunday, 19 May 2019

Antique Memory Box.

Hi Friends, presenting a beautiful Memory Box...
This time instead of using Modelling Paste, I used PuttyFiller. To my surprise, it came out very well. I used Lattice stencil from The Crafter's Workshop. one of my favourite stencil.. I painted the whole thing with Black Gesso. Allowed them to dry completely. Used some beautiful embellishment from my stash to decorate the box. Glued them with 3D Gel Medium. Once it all dried, I painted the whole thing with Black Gesso again. Randomly I used White Gesso on some spot using dry brush technique.
Now the fun part started.. Use ur imagination and play with ur colours.. I will link the Video tutorial below


Here is the list of products I used in this project..


Lindy's Spray 
Tainted Love Teal & Delphinium Turquoise 
Art Alchemy Metallique Paints
Emerald Green, Midnight Sky, Royal Blue, Coral Reef, Crocus Fields & Plum Preserves
Sparks
Ginger Magic
Silks 
African Jade, Pomegranate & Emperor's Gold
Wax
White Gold & Peacock

Video tutorial step by step:


Thank you for visiting my Blog.. Pls don't forget to subscribe my Youtube channel Kreativity77


Jewellery Box

Hi Everyone, 
A Jewellery Box I made for my niece.. She has shown interest on my works and has always wanted one like this.. On her vacation to our home, she wanted to make one for her.

We started it from the scratch by preparing the base by applying Black Gesso all over the box...  Then we added some textures using Stencil and home made modelling paste. Below, I have attached my video on how to make modelling paste of your own. Hope you will enjoy that, if so please do subscribe my youtube channel  Kreativity77. 

Back to this, I covered all with Black Gesso. It's time to add embellishments. I added few from my stash and you can add whatever you want as per your liking.. Unleash your creativity here.  Then paint everything with Black Gesso.. Allow them to dry completely. Do your painting with the colour of your choice to complete the product. 

Below I have listed the products I used in this project.  


Lindys Spray:
Delphinium Turquoise & Tainted Love Teal

Sparks:
Raven Black

Art Alchemy Métallique Wax:
Rich Copper, Fire Ruby & White Gold

Opal Magic Wax:
Royal Robes, White Gold & Rose Gold


Link for Homemade modelling paste


Thank you for visiting my Blog. Pls Like, Comment and Subscribe to my channel.


Friday, 3 May 2019

Jewel Box


Hello Friends, After a very long break Iam back with another cute project.. I did this for my mom. she always love to have cute boxes like this. So did one for her and she loves it. This is a wooden box which she bought it in Micheals during her visit to my sister's house in US.


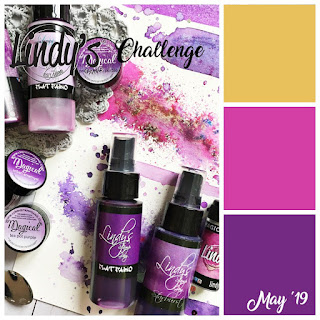
 Lindys May Challenge


Ok lets start...


I had some brick chipboard in my hand, so I used that. If u don’t have one, u can cut from thin chipboard as ur desire size.. Start glueing the bricks near by..  It was pretty hard to stick in the corner since it's curve in shape.. Once I glued, I used a band to hold in place and it helped me... Let them sit to dry completely..


  The cover I decorated with the things I have in my stash. I used lot of cloth pin to create a background and I loved the effects..


 I did a simple arrangement on top. U can arrange as ur hearts desire.. I glued them with 3D Heavy Gel Medium. Once it all dried I primed the whole box with White Gesso..  Allow them to dry completely


Now the fun part started..  Start adding colours as ur hearts preference....

I listed down the list of the products I used in this project.. 

Lindys Gang Spray

Shaker

Art Alchemy Metallique Paints 
Dark Velvet, Mermaid Teal,  Royal Red, Gold Rush, Pink Blush, Black Berry, Royal Blue 

Sparks 
 Ginger Magic. 

Opal Magic 
Blue Violet, Pink Blue, Teal Pink, violet Green. 

Silks Acrylic Paints 
Pink Anthurium, Sunflower, Bolivian Blue, Emperor's Gold, Watermelon, Vavoomi Red.

Wax
White Gold, Royal Robes, Fire Ruby  


 Below is my video tutorial via my youtube channel kreativity77. Hope it's more informative. Please do subscribe my channel after watching it.


 If you enjoyed it, pls LIKE / COMMENT/ SUBSCRIBE.
 Thank you.


Wednesday, 27 June 2018

VINTAGE JOURNAL COVER


Dear Friends, this project was pending for a longtime and finally I did it.. Inspired by Finnabair..


I removed the cover from the journal book and decided to give a special antique look. I Primed the whole cover with Black Gesso. Once  dried, I added the Prima Art Extravagance Texture crackle paste in some areas to give a crackle effect.. Left it to dry over night ... Once dried, we can see the crackle effect... I applied Prima Soft Gloss Gel all over the texture. This will help the crackle texture not to fall off. 


I started adding my embellishments from my stash.. I used Prima Art Basics 3D gloss gel and Glossy Accent to glue my embellishments.. Once it dried I again Primed all with Black Gesso.In some area I have to use Lindys spray Blazing Black Spray.. So that it can cover every places to black.... 


Used lot of Art Alchemy Metallique paints and waxes in this project.. 


Start colouring from Art alchemy Metallique Paints Royal Blue, Mermaid Teal, Dark velvet, Pink Blush, Ancient Coin, Rich Turquoise, Sparks Dragon’s Eye, Unicorn’s Hair, Art Alchemy Opal Magic Pink Blue, Violet Gold, Rose Gold , Violet Green, Pink Blue, Art Alchemy Antique Brilliance Metallique Wax, Fire Ruby, White Gold... Love the way it turned..


Pls watch my step by step video tutorial.. 
Thanku for visiting my Blog..


Monday, 11 June 2018

Bible verse Canvas


Hi Friends, I Love this verse and decided to create a Bible Verse Canvas.... 


Started priming the canvas with Art Alchemy White Gesso. Using the Art Basic Modelling Paste and TCW Organic Matter Stencil, Moving Vines Stencil, Party Lights Stencil,  I created a beautiful background texture.. I used Lindys Spray Time Travel Teal, Tibetan Poppy Teal, Magnolia Magenta Gold, Grab A Guy Gold.. Art Alchemy Metallique Paints Gold Rush, Fresh Orange, Dark Velvet, Midnight Sky, Green Olives, Dark Forest.,,.. 


Added Some cute flowers From Peteloo Botanica collection and from my stash.. I used Sizzix Endlesslove to cut the Alphabets.. then arranged it to fill the frame. love the frame it turned out..


Hope u too loved it.. 
Thanku for visiting my Blog..